Windows Virtual Server: How To Add IP to Your Network Interface
For this guide, we use subnet 45.139.181.36/30 as an example. It is assigned to a Cloud Server.
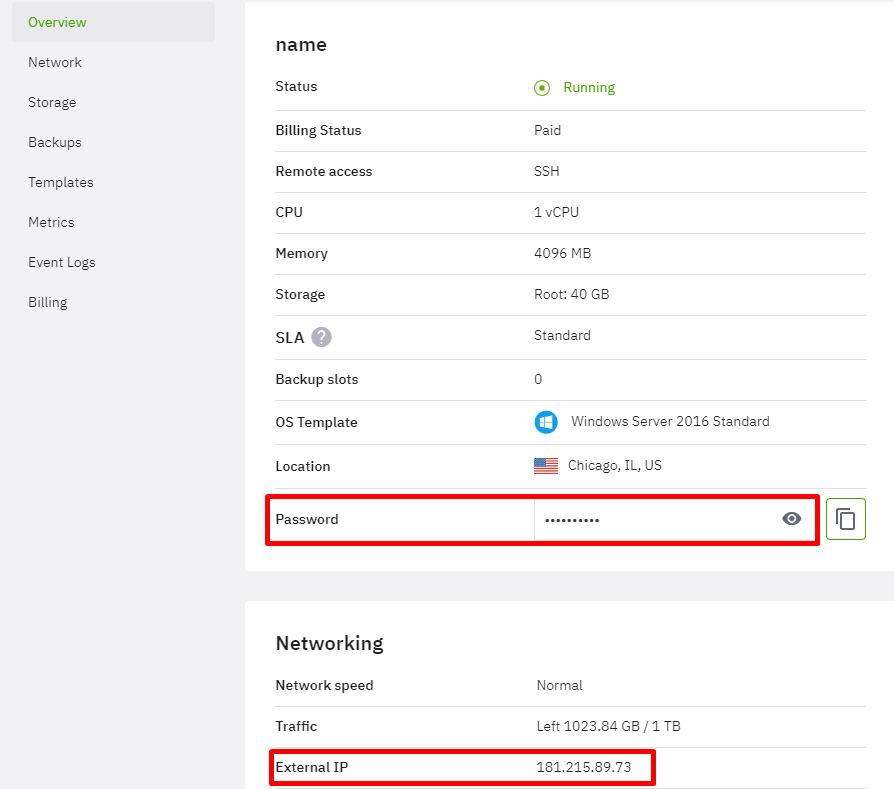
To add IPs to the network interface, you have to connect to the server. You can find connection details at Terminal > Cloud Hosting > Cloud Servers > your chosen server > Overview.
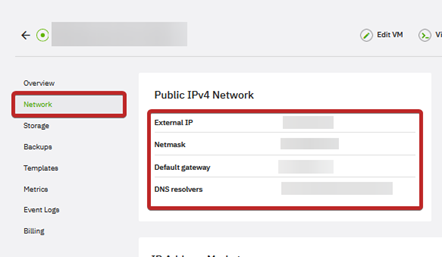
You can find information about your network server at Terminal > Cloud Hosting > Cloud Servers > your chosen server > Network.
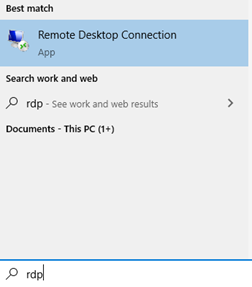
To connect to the server, we will use RDP (Remote Desktop Protocol). Use Remote Desktop Connection on your computer.
Enter your server’s External IP into the Computer field and then click Connect.
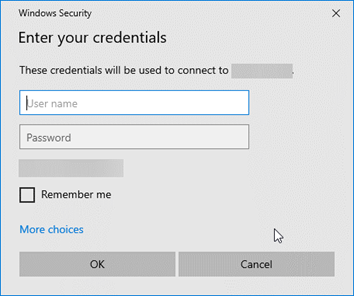
In the Enter your credentials window, enter the User name and Password. Click OK.
NOTE: The default user name for RDP is Administrator. In the password field, enter your server’s password.
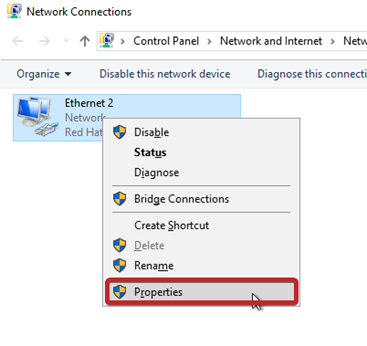
Once you are connected, go to Control Panel > Network and Internet > Network and Sharing Center > Change adapter settings.

Open the Properties of your network interface.
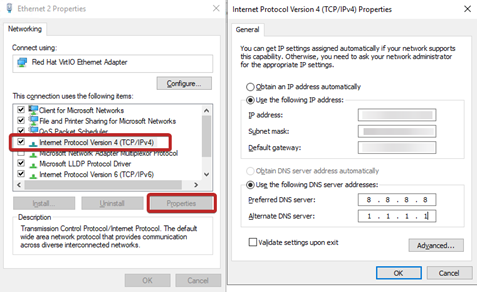
Now choose Internet Protocol Version 4 (TCP/IPv4) in the list and click Properties.
NOTE: If the fields under Use the following IP address are empty, enter the Network information manually.
Click Advanced… and click Add under IP addresses. Add the desired IP address and Subnet mask. Click Add.
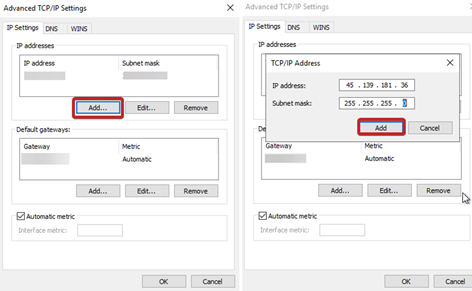
Click OK to save the changes and then exit the window.
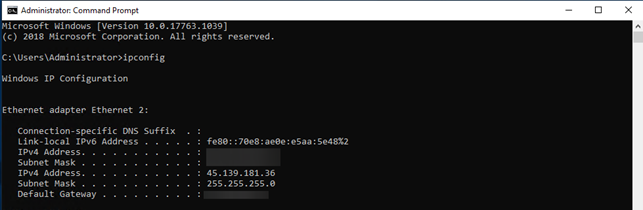
Next, search for CMD (Command Prompt) and Run as administrator.
Enter the following command to make sure that the IP address has appeared on the network interface:
ipconfig
Important!
Do not forget to stop and then start the Cloud Server after assigning additional IPs to it.
Let’s check if this added IP is pinging.
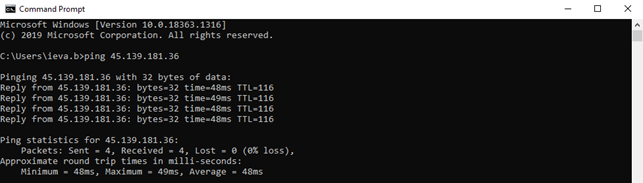
In our example, the IP is now configured on the network interface.
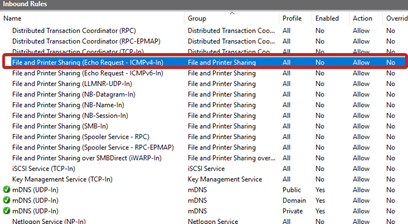
NOTE: If you require the IP to respond to ping requests, please make this modification on the firewall:
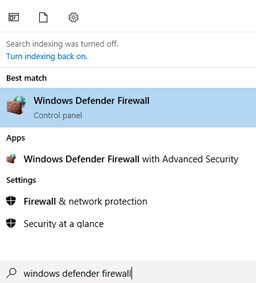
Search for Windows Defender Firewall.
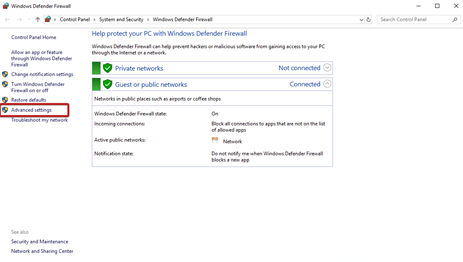
Click Advanced Settings.
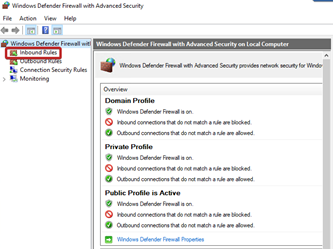
Click Inbound Rules.
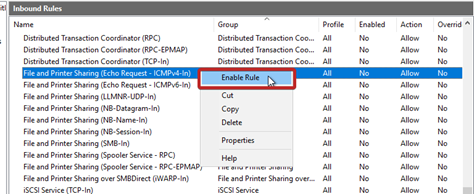
Search for File and Printer Sharing (Echo Request – ICMPv4-In).
Right-click the entry and then click Enable Rule.
If you need any further help, you can always contact our Support team by submitting a Ticket.
Related articles:
Was this article helpful?
Need support?
If you need any further help, don't hesitate to send a support request to our support team.