Assigning additional IP to NIC
In this guide, we’ll walk you through a few simple steps showing you the process of assigning your newly purchased IP range to your network interface card (NIC). There are many ways to do so, but we’ll only focus on the simplest and safest approach. This guide will cover the process of assigning IP ranges to NIC on Ubuntu, CentOS and Debian Linux.
Assingning additional IP ranges to Ubuntu 18 – Ubuntu 20
To assign a new IP range to Ubuntu 18.04 and newer, we’ll be using netplan.
Log into your server via the Heficed terminal or SHH and change the directory to to /etc/netplan
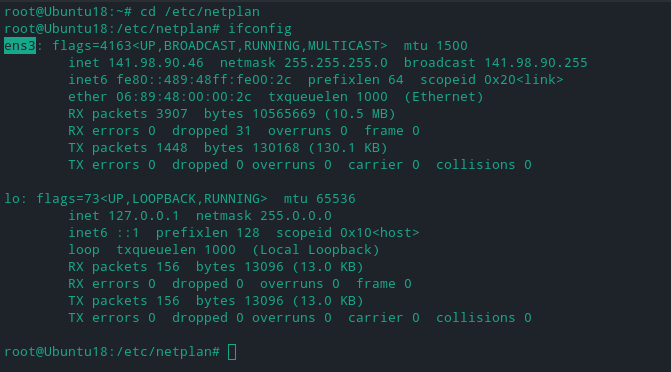
cd /etc/netplanFirst, we’ll have to choose the network interface card we wish to assign the additional IP range to. To list all available network interfaces type ifconfig
ifconfigIn this example, the only NIC available to us is ens3. Let’s assign 85.208.113.56/29 to it.
Next, using your favorite text editor create a new .yaml file named 01-network-manager-all.yaml
nano 01-network-manager-all.yamlIn the newly created file, type:
network:
  version: 2
  ethernets:
    ens3:
      dhcp4: false
      addresses:
        - 141.98.90.46/24
        - 85.208.113.49/29
        - 85.208.113.50/29
        - 85.208.113.51/29
        - 85.208.113.52/29
        - 85.208.113.53/29
      gateway4: 141.98.90.1
      nameservers:
        addresses:
          - 8.8.8.8
          - 8.8.1.1
Keep in mind that you should respect a proper indentation for each line since the prefixed number of spaces for each line is important, no TAB‘s are allowed. Not adhering to this, may lead up to an error message similar to: Invalid YAML at /etc/netplan/01-network-manager-all.yaml line 5 column 4: did not find expected key
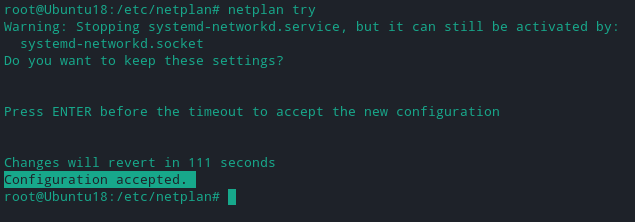
Once you’ve made sure that the indentations are correct, press ctrl+x then y then enter to save the configuration file. Our next step is to test if the configuration file is accepted by netplan. We can do that by typing the following command:
netplan tryIf no mistakes we’re made in our configuration file, we should be presented with a message saying “Configuration accepted“.
Next, let’s apply the new configuration to netplan:
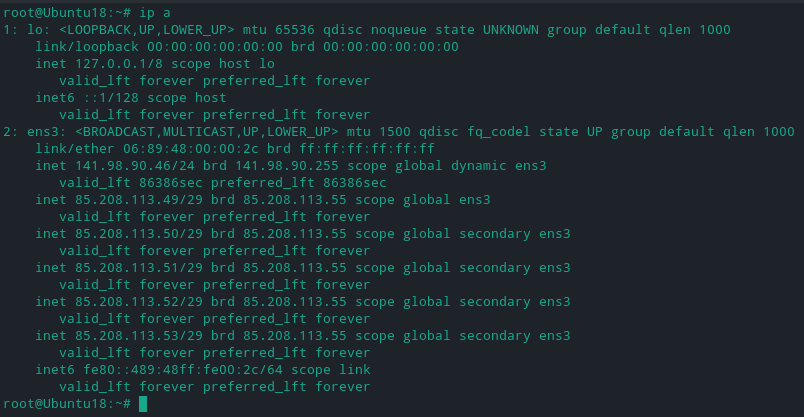
netplan applyThe only thing left to do is to stop/start the server to allow outgoing traffic. You can do that directly from your Heficed terminal. Now that our server is restarted, let’s check if the new configuration was successfully applied to our NIC. We can do that by typing:
ip aThe output should provide you with all IP addresses currently assigned to your NIC.
Lastly, let’s check if we can reach each individual IP via ping:
ping -c4 85.208.113.52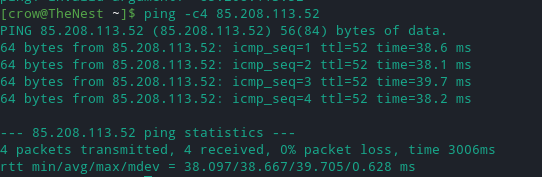
Success, the new range is configured on your network interface.
Assingning additional IP ranges to NIC at CentOS
We’ll be assigning 5.180.233.88/29 to our CentOS7 cloud server.
First, let’s change the directory and make a copy of our network configuration file:
cd /etc/sysconfig/network-scripts && cp ifcfg-eth0 ifcfg-eth0-range0Edit the file by adding the missing lines as in the example below.
vi ifcfg-eth0-range0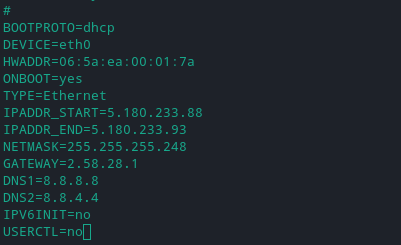
Press ESC then: and type wq to save the changes and exit the text editor. Next, we’ll have to restart our network service in order for the changes to take place.
service network restart
We can see our newly configured IP addresses by typing out the ip a command:
ip a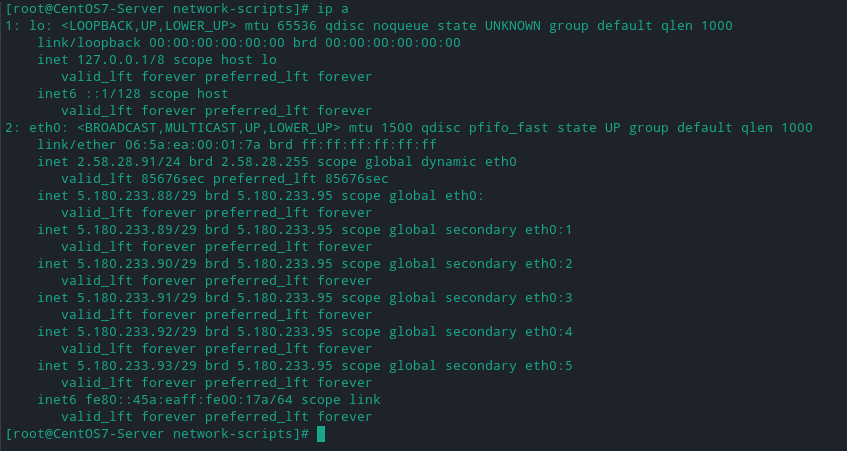
We can see that our new configuration has been applied successfully. Remember to always stop/start the cloud server via the Heficed terminal after you add a new IP range. Once that’s out of the way, let’s test if we’re able to reach outside destinations via our new IP’s
ping -S 5.180.233.93 google.com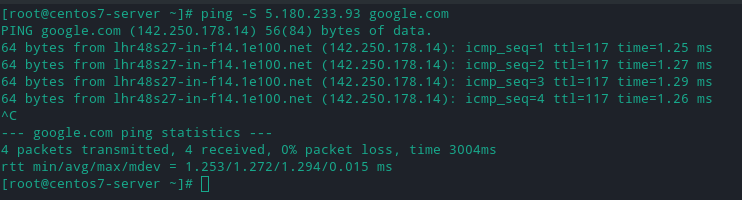
Success!
Assigning to Debian Linux
Let’s assign 193.188.195.216/29 to our Debian 9 cloud server. For this guide, we strongly suggest you to connect to your server via SSH in order to save time.
To begin with, we should backup the current network interface configuration file. We can do that by simply copying and renaming the file.
sudo cp /etc/network/interfaces /etc/network/interfaces_bakNext, we have to find the network interface we’ll be assigning the new range to. We can do that by typing ifconfig.
ifconfig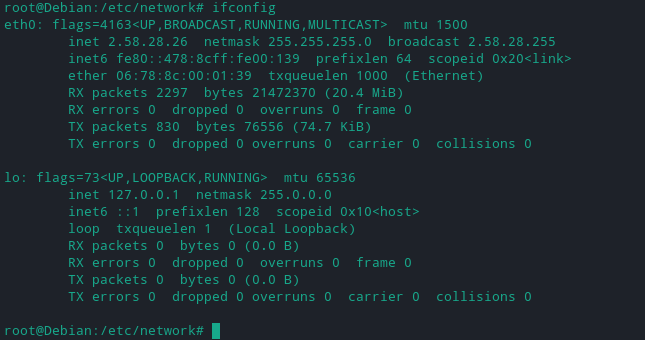
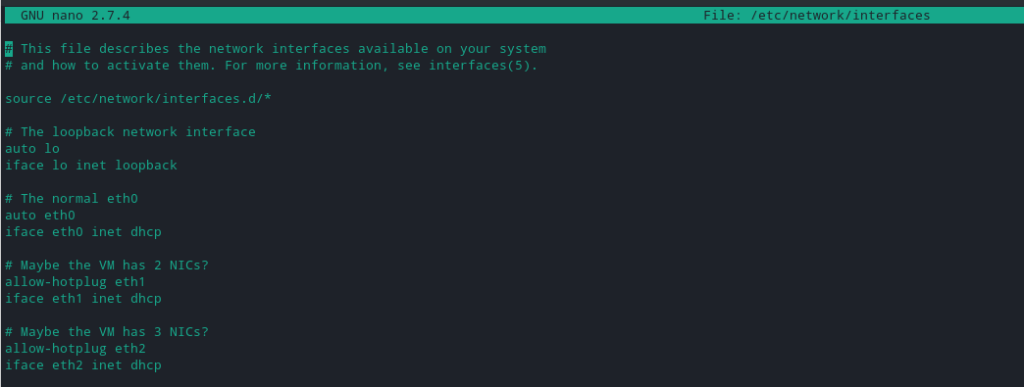
In this case, we’ll be adding it to the interface named eth. Edit the configuration with your favorite text editor, we’ll be using nano in this example.
nano /etc/network/interfacesThe unedited configuration file will look something like this:
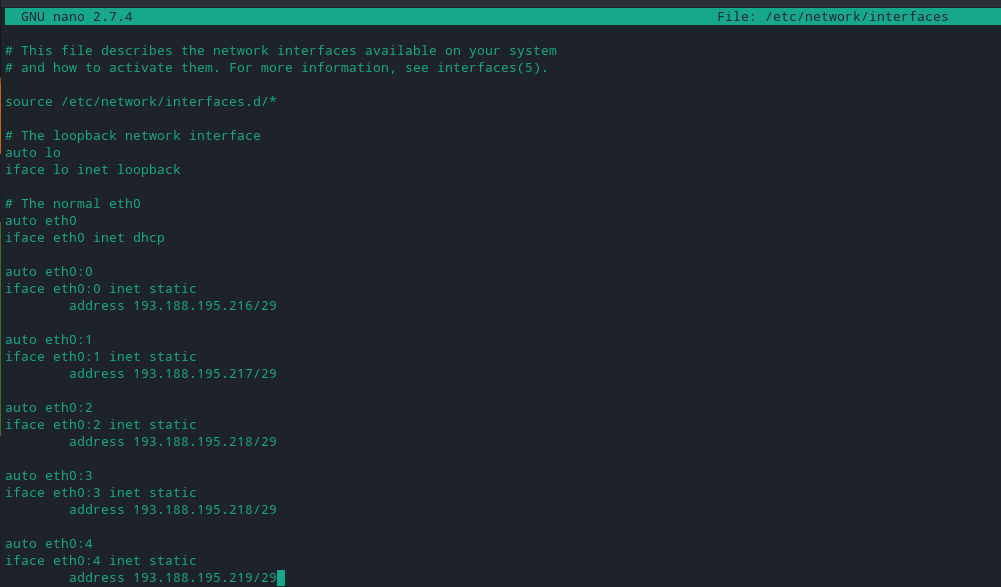
We’ll now have to configure the additional IP’s by adding the following lines:
auto eth0:0
iface eth0:0 inet static
        address 193.188.195.216/29

auto eth0:1
iface eth0:1 inet static
        address 193.188.195.217/29
Once all IP’s are added, reboot the server for changes to be applied
rebootLog back into your server and check if the IP’s have been added to your network interface by typing ip a
ip a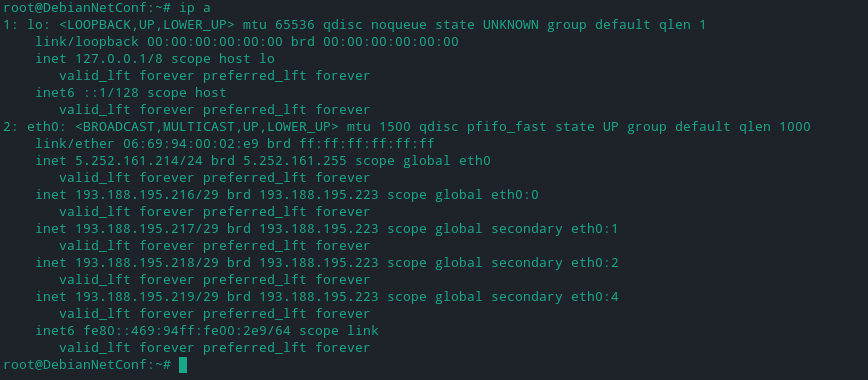
Now, let’s do some ping testing to confirm everything is working fine. To ping outside networks using one of the newly configured IP’s type:
ping -S 193.188.195.218 google.comYou may as well use your personal machine to ping one of the addresses to check if inbound traffic is reaching your server.
ping 193.188.195.218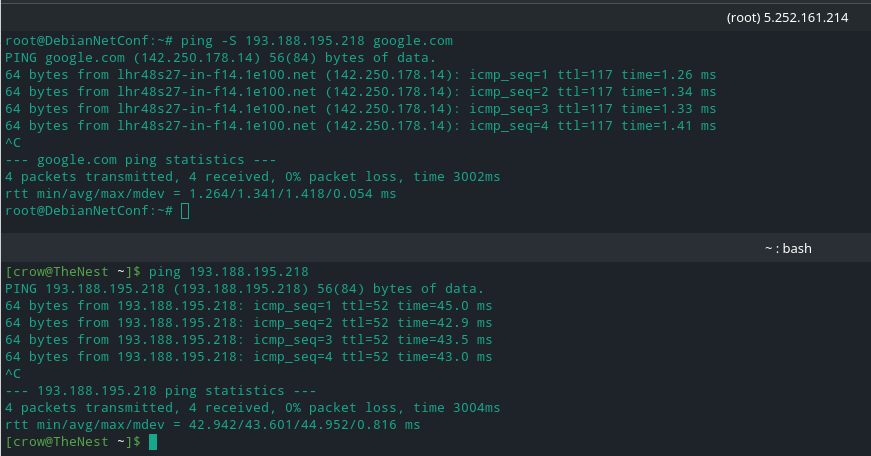
Success!
Related articles:
Was this article helpful?
Need support?
If you need any further help, don't hesitate to send a support request to our support team.