How To Assign IP Addresses to the Server
Once you order new IP addresses, it is easy to assign them to your Cloud Hosting and Bare Metal servers. Follow the instructions to learn how to do it.
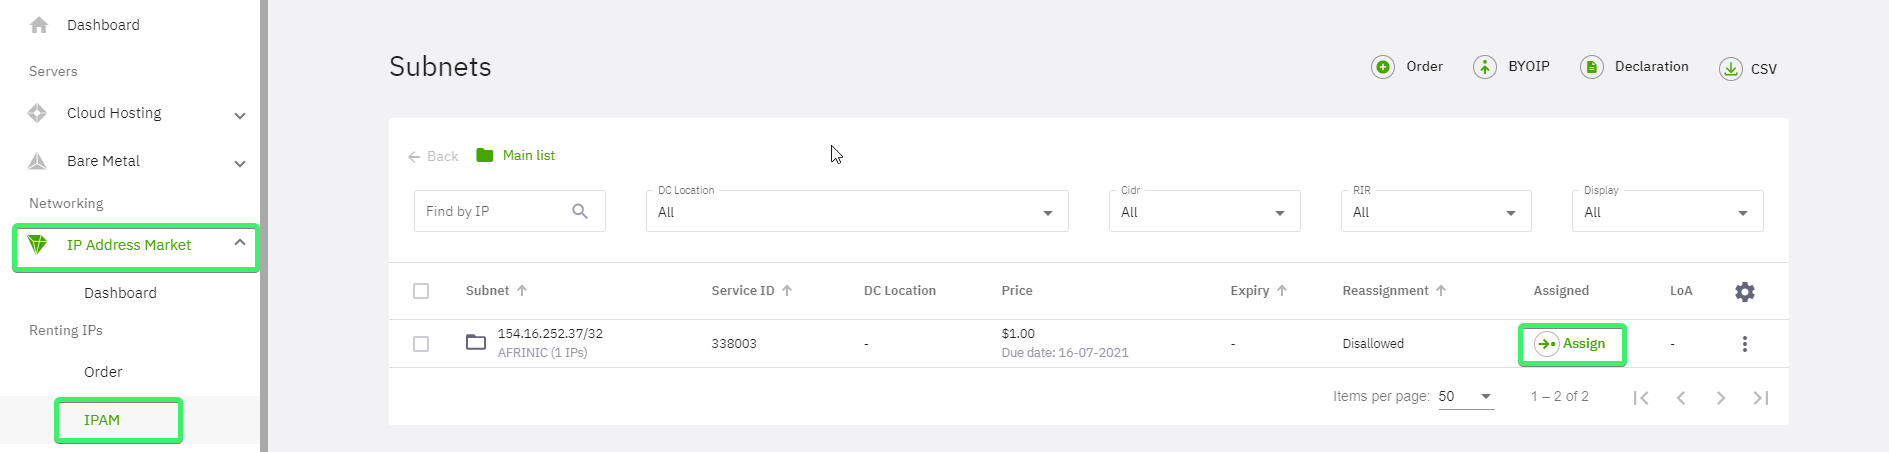
1. Log in to the Terminal, go to the Additional IPs section > IPAM, locate your IP address range and click Assign.
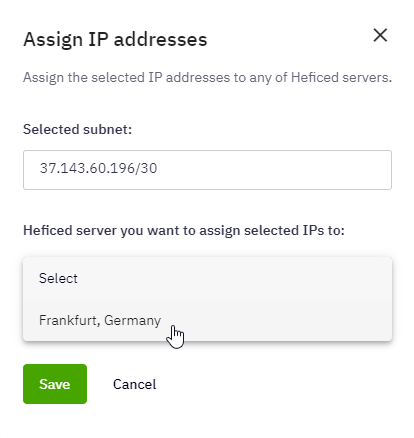
2. Select the location of the server to which you want to assign IPs.
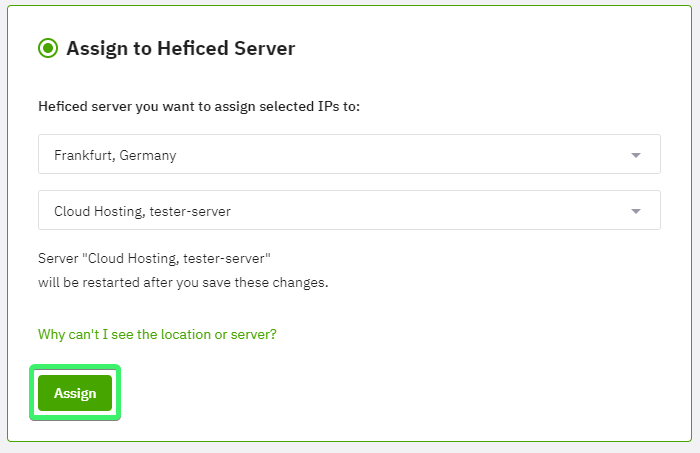
3. Choose a server in the chosen location and click Save.
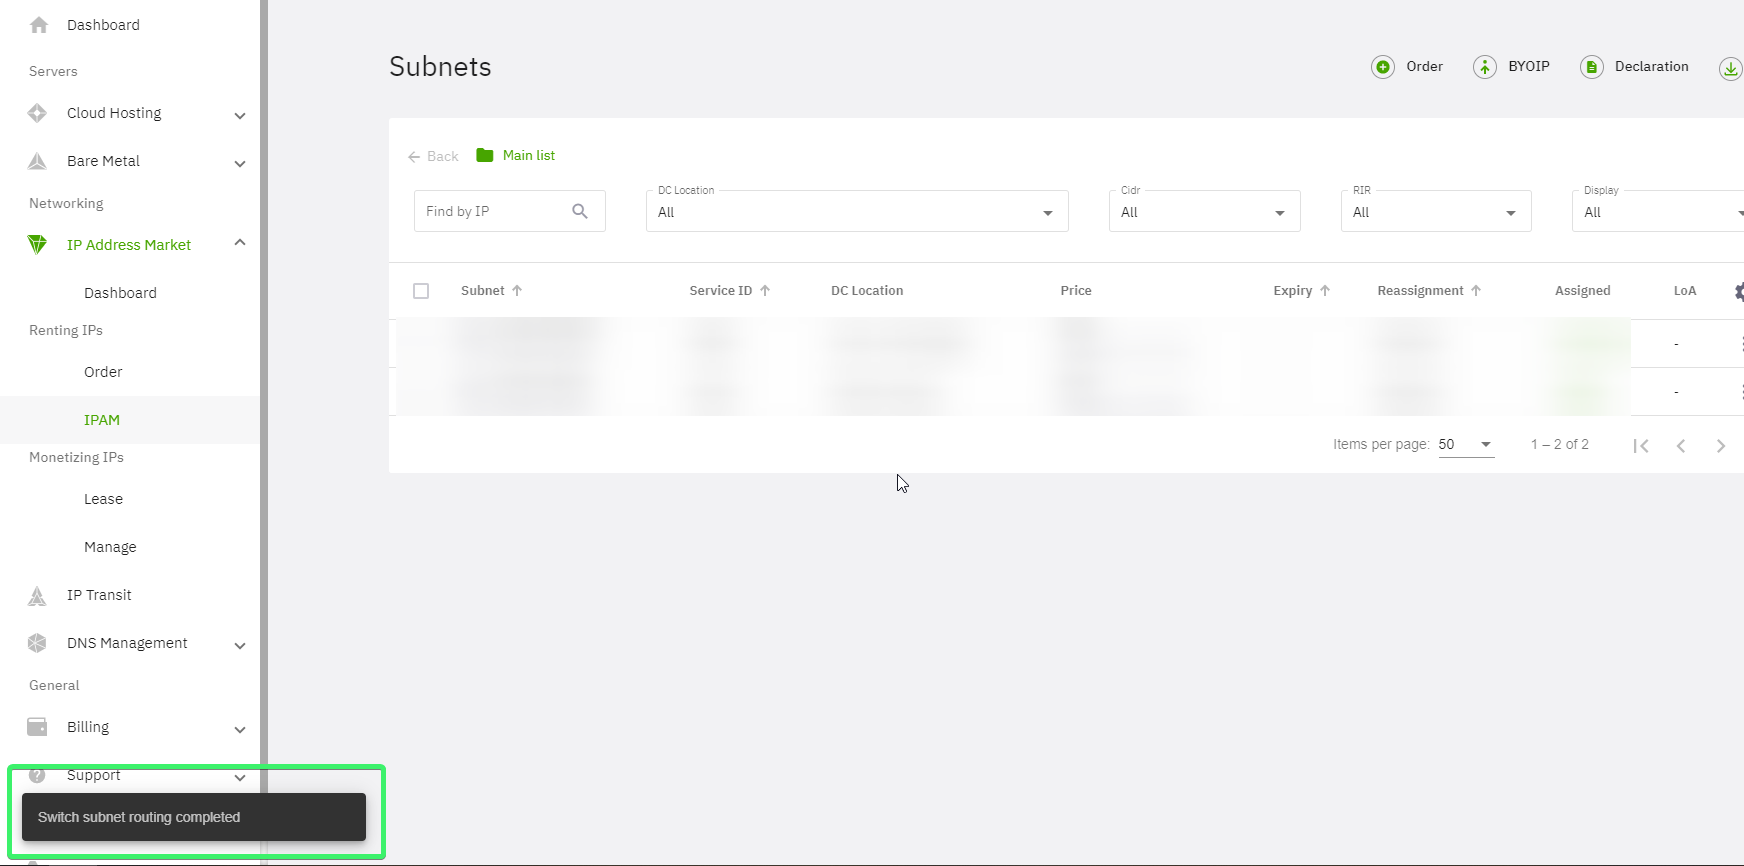
You should see a message stating that routing was completed successfully.
NOTE: If an error appears instead, submit a ticket or contact us directly at support@heficed.com.
Please keep in mind that if you assign your IP ranges to a Cloud Hosting server, you will also have to perform STOP/START actions to allow traffic through the assigned IP addresses.


Finally, to make your IP addresses usable on your server, configure IPs on your network interface.
If you have any other questions, please send us a message at support@heficed.com any time.
Was this article helpful?
Need support?
If you need any further help, don't hesitate to send a support request to our support team.