How to Order IP Addresses
Heficed’s Additional IPs section is the world’s first automated IP management solution, which has been launched as IPXO.
Continue reading if you wish to learn how to order IP addresses using the Additional IPs section.
NOTE: You need to have a verified Business Organization to use the Additional IPs section. If you already have a Personal Organization account, you can change it to a Business Organization.
1. Log in to the Terminal.
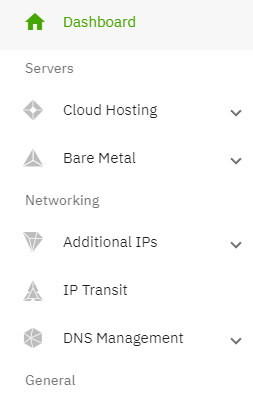
2. Go to Additional IPs > Order.
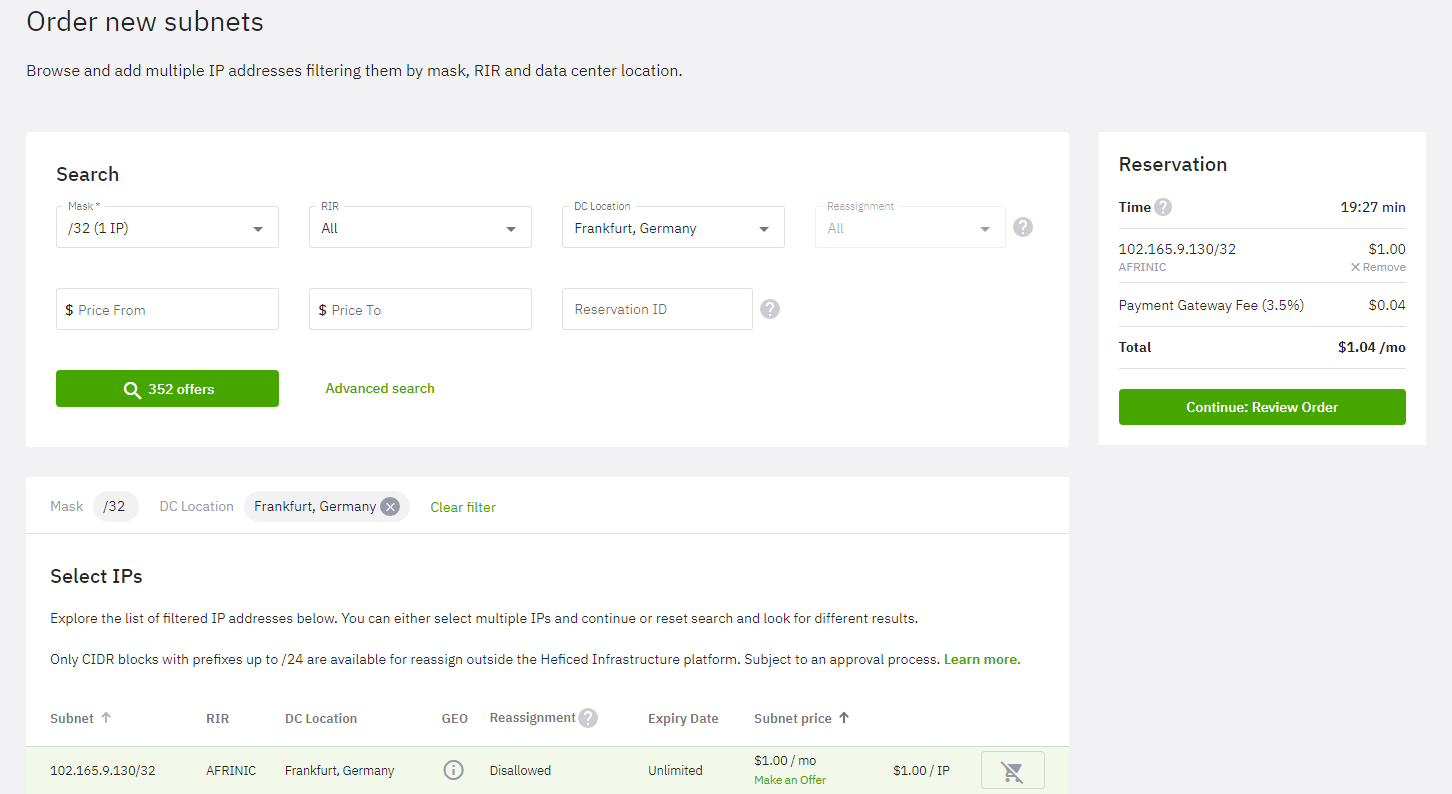
3. Choose the preferred RIR, and DC Location. Click Search.
Once the list of available subnets appears, select the subnets you want. They will be reserved for a short time.
Once you select the desired IP ranges, click Continue and complete the purchase.
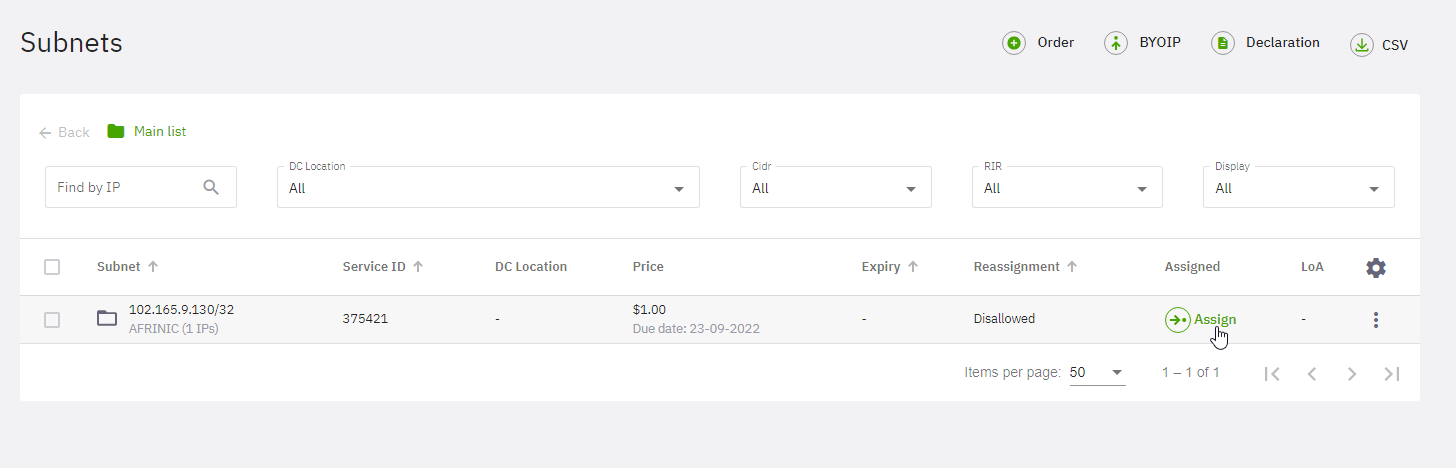
4. Once the invoice is paid, you will find your subnets in Terminal > Additional IPs > IPAM. At this point, your subnets are ready to be assigned.
If you face any issues ordering IP addresses, contact our Support team via Terminal > Support > Tickets > Submit a ticket.
Was this article helpful?
Need support?
If you need any further help, don't hesitate to send a support request to our support team.